The Ultimate 14-Day Emergency Kit List for Homeowners
Get a complete 14-day emergency kit list for homeowners, with practical tips on food, water, medical supplies, and gear to keep your family safe.
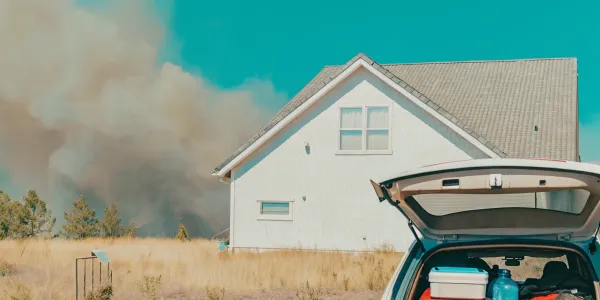
Living in a high-risk fire zone means dealing with more than just the threat of flames; it’s a constant battle with insurance non-renewals and rising costs. While you can’t control the insurance market, you can take charge of your family’s readiness. Being prepared is a powerful statement that you are doing everything possible to protect your home and loved ones. An emergency kit is a fundamental part of that proactive stance. This guide provides a clear, no-nonsense 14-day emergency kit list to help you build a lifeline you can count on, giving you control in an uncontrollable situation.
Key Takeaways
- Plan for 14 Days of Self-Sufficiency: Your goal is to have enough food, water (one gallon per person, per day), and supplies to last two weeks without outside help. This timeframe is crucial because it accounts for potential delays in emergency response after a major event.
- Assemble More Than Just Food and Water: A truly effective kit includes tools for safety and communication. Pack flashlights, a hand-crank radio, a complete first-aid kit, copies of vital documents, and any necessary medications to handle a crisis confidently.
- Make It Personal and Keep It Fresh: Customize your kit for the unique needs of your family, including pets, children, and anyone with medical conditions. Treat your kit as a living resource by checking and rotating supplies every six months to ensure everything is effective and ready to go.
What Goes Into a 14-Day Emergency Kit?
Building an emergency kit is one of the most important steps you can take to protect your family. When a wildfire or another disaster strikes, emergency services can be overwhelmed, and you might be on your own for longer than you think. Having the right supplies on hand means you can stay safe and self-sufficient until help arrives or it’s safe to return home. Think of it as your family’s safety net. A well-stocked kit removes the panic of scrambling for supplies during a crisis, giving you the peace of mind to focus on what matters most: getting to safety.
Why You Need a 14-Day Supply
After a major disaster, it can take time for first responders to reach everyone. Roads may be blocked, communication lines down, and resources stretched thin. That’s why experts and government agencies recommend having enough supplies to last for at least two weeks. The goal is to be Two Weeks Ready, ensuring your household can manage without outside help. This 14-day buffer gives you and your family the resources to handle a prolonged power outage, evacuation, or shelter-in-place order. It’s a practical timeframe that accounts for potential delays and ensures you aren’t left vulnerable in the critical days following an emergency.
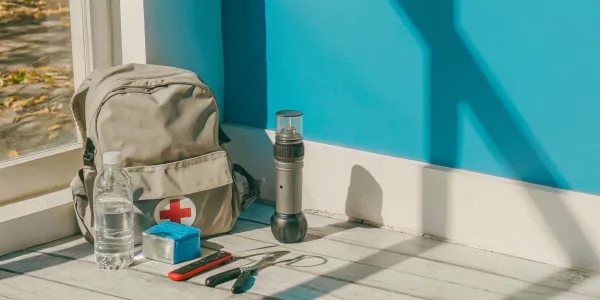
The Core Components of Your Kit
While we’ll get into more detail later, every emergency kit should be built around a core set of essentials. These are the non-negotiable items that address your most basic survival needs. When you build a kit, start with these fundamentals to create a solid foundation you can customize for your family’s specific needs.
Your core components should include:
- Water: One gallon per person, per day.
- Food: A supply of non-perishable, easy-to-prepare food.
- First-Aid Kit: A well-stocked kit to handle common injuries.
- Lighting: Flashlights or headlamps with extra batteries.
- Communication: A battery-powered or hand-crank radio to receive emergency broadcasts.
- Medications: A supply of prescription and over-the-counter medicines.
- Important Documents: Copies of IDs, insurance policies, and bank records stored in a waterproof bag.
Stocking Up on Food and Water
When an emergency like a wildfire strikes, access to grocery stores and clean running water can be cut off instantly. That’s why having a dedicated supply of food and water is one of the most important steps you can take. The goal is to have enough for every person in your household to last for 14 days without needing to leave home. This supply ensures you can stay safe and healthy, whether you’re sheltering in place during a fire or dealing with power outages in its aftermath.
Thinking about a two-week supply can feel overwhelming, but it’s entirely manageable when you break it down. It’s not about buying strange survival rations you’ll never touch. It’s about stocking up on familiar, easy-to-prepare foods that can provide comfort and normalcy during a stressful time. Having this ready removes a huge source of anxiety, freeing you up to focus on other critical tasks when it matters most.
How to Store Water Safely
Water is the single most important item in your emergency kit. The standard recommendation is to store at least one gallon of water per person, per day. For a 14-day kit, that means 14 gallons for each member of your family, including pets. This amount covers drinking as well as basic hygiene and sanitation needs. The easiest and safest method is to buy commercially bottled water and store it in a cool, dark place. Avoid storing it in areas with direct sunlight or extreme temperatures, like a garage or shed, as heat can cause the plastic to break down. Check the expiration dates when you buy, and remember to rotate your supply every six months to keep it fresh.
Choosing the Right Non-Perishable Foods
Your emergency food supply should be filled with items your family already eats and enjoys. Focus on non-perishable foods that require no cooking or refrigeration, since you may be without power. Good options include ready-to-eat canned meats, fruits, and vegetables. Also, stock up on protein bars, granola, dried fruit, peanut butter, and crackers. These high-energy foods are easy to pack if you need to evacuate. Don't forget comfort items like instant coffee, tea, or powdered drink mixes. And, most importantly, pack a manual can opener. You can find a comprehensive list of what to include in your safety kit from government resources.
Planning for Special Diets
Every family is different, so your emergency kit should reflect your unique needs. If you have an infant, be sure to pack formula, bottles, and baby food. For toddlers or picky eaters, include familiar snacks and juices. You should also account for any family members with food allergies, health conditions, or other dietary restrictions. This is also the time to think about your pets. Pack a two-week supply of their food and extra water, as their needs can easily be overlooked in a crisis. The federal government’s Ready.gov site offers great guidance on how to build a kit that considers the needs of every family member, including older adults and those with disabilities.
How to Keep Your Food Supply Fresh
Building your kit is the first step, but maintaining it is just as important. Food doesn’t last forever, even when it’s non-perishable. Set a reminder on your phone or calendar to check your emergency supplies every six months. Look for expiration dates and rotate out any items that are getting close. You can move these items into your regular pantry to be eaten, and replace them with fresh supplies in your kit. This "first in, first out" system prevents waste and ensures your kit is always ready. To protect your food from pests and moisture, store boxed items like cereal and crackers in tightly sealed plastic or metal containers.
Assembling Your Medical and Health Supplies
When you’re forced to evacuate or shelter in place, the last thing you want to worry about is tracking down a pharmacy or dealing with a minor injury without the right supplies. Access to medical care can be limited or completely cut off during a wildfire or other disaster. That’s why a dedicated section of your emergency kit for health and medical needs isn’t just a good idea—it’s essential for your family’s well-being and safety. Taking the time to assemble these items now provides peace of mind and ensures you’re ready for anything.
What to Put in Your First-Aid Kit
Your kit should be built around a solid foundation of first-aid supplies. You don’t need to be a paramedic, but having the right tools to treat common injuries like cuts, scrapes, or burns can prevent them from becoming bigger problems. Start with a well-stocked first-aid kit that includes adhesive bandages in various sizes, sterile gauze pads, antiseptic wipes, medical tape, scissors, and tweezers. It’s also smart to include over-the-counter pain relievers, anti-diarrhea medication, and any allergy medications your family uses. Check your kit twice a year to replace any expired items.
Managing Prescription Medications
For anyone who relies on daily medication, this is one of the most critical parts of your kit. Pack at least a two-week supply of all prescription medications for every family member. It can be difficult to get refills during an emergency, so having an extra supply on hand is crucial. Keep the medications in their original containers if possible. You should also include a waterproof copy of your prescriptions with dosages, your doctors' names and phone numbers, and information about your pharmacy. This list will be invaluable if you need to seek medical help or replace your medications.
Packing Special Medical Equipment
Think through the specific health needs of everyone in your household. Does anyone wear glasses or contact lenses? Pack an extra pair of glasses and contact lens solution. If a family member uses hearing aids, be sure to include extra batteries. Other items to consider are syringes, blood sugar monitoring equipment, or a portable nebulizer for those with asthma. The goal is to make sure everyone can manage their personal health conditions without interruption, even if you’re away from home for an extended period.
Don't Forget Mental Health and Comfort
Surviving a disaster is incredibly stressful, especially for children. Packing a few items for comfort and mental well-being can make a huge difference in how your family copes with the situation. Include items that can provide a welcome distraction and a sense of normalcy, like books, puzzles, or a deck of cards. For young kids, a favorite stuffed animal or blanket can be incredibly reassuring. Taking steps to manage stress is a key part of any emergency plan, and these small comforts can help everyone feel more secure.
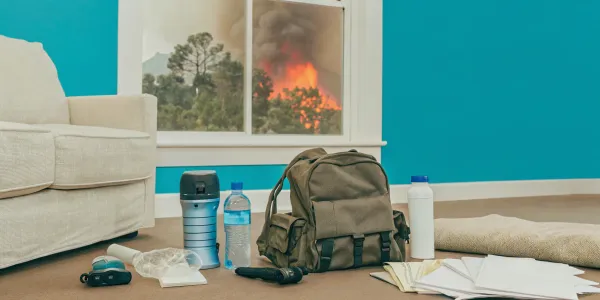
Gathering Your Critical Emergency Gear
Beyond food and water, having the right gear is what allows you to manage a crisis, stay informed, and begin the recovery process. When the power is out and emergency services are stretched thin, these tools can make a critical difference in your family’s safety and comfort. Think of this as your go-to toolkit for navigating the immediate aftermath of a wildfire or any other disaster that disrupts normal life. Having these items organized and ready means you can act quickly and confidently when every second counts. A complete Wildfire Action Plan includes not just an evacuation route, but also a well-stocked kit that supports you through the uncertainty.
How to Keep the Lights On
A power outage can happen without warning, plunging your home into darkness and making even simple tasks difficult and dangerous. Your emergency kit should include several sources of light. Pack at least one bright flashlight, and make sure you have plenty of extra batteries stored with it. Many people prefer LED headlamps, which keep your hands free for carrying other items or helping family members. It’s a good idea to have a flashlight in your main kit and smaller ones in bedrooms or cars. The American Red Cross lists a flashlight and batteries as fundamental parts of any survival kit supplies for this very reason.
How to Stay Connected
During a wildfire or evacuation, information is your most valuable resource. Official instructions and updates on changing conditions are critical for your safety. Your plan should include multiple ways to stay connected. Keep your cell phone fully charged, and pack portable power banks and all necessary charging cables in your kit. Since cell service can be unreliable, a battery-powered or hand-crank radio is also essential for receiving emergency broadcasts. Having a reliable way to get news and instructions from safety officials can guide your decisions and help you avoid danger.
Securing Your Important Documents
If you have to evacuate, you may not have time to search for critical paperwork. Losing important documents can make the recovery process incredibly difficult. Gather copies of your essential records and store them in a waterproof and fire-resistant bag within your emergency kit. This includes items like driver’s licenses, passports, social security cards, birth certificates, and insurance policies. You should also include bank account details, medical records, and recent photos of your family members and pets. Having these important family documents organized and protected will be a huge relief when you need to file claims or prove your identity.
Essential Tools You'll Need
In an emergency, you may need to be your own handy person. A few basic tools can help you solve minor problems, from opening canned food to turning off utilities if instructed by officials. Your kit should include a multi-purpose tool, like a Swiss Army knife or Leatherman, which combines several functions into one. Also pack a manual can opener for your food supply, along with scissors and pliers. These simple items don’t take up much space but provide crucial capabilities when you need to be self-sufficient. These tools are a core part of being prepared for the unexpected.
Packing for Personal Care and Hygiene
When you’re forced to leave your home, maintaining a sense of normalcy is crucial for your well-being. Packing personal care items helps you stay healthy, comfortable, and in control during a stressful time.
Key Sanitation Supplies
Maintaining basic cleanliness is your first line of defense against illness, especially when displaced or without power. Start with the non-negotiables: soap, toothbrushes, toothpaste, and toilet paper. The American Red Cross includes these in its list of essential survival kit supplies. Pack travel-sized versions to save space, but make sure you have enough for everyone in your household for 14 days. Having these simple items on hand provides a small but significant sense of routine and dignity, which shouldn't be underestimated during an emergency.
Everyday Hygiene Items
You’ll need items to handle situations where running water isn’t available. Pack moist towelettes, hand sanitizer, and disinfecting wipes to clean hands and surfaces. These are invaluable for staying clean on the go. Don’t forget practical supplies like garbage bags and plastic ties for trash and sanitation. It’s also crucial to include personal items like feminine hygiene products and any other specific supplies your family uses daily. The federal government’s Build A Kit guide emphasizes these items for a reason—they are essential for preventing the spread of germs and maintaining a safe environment.
Adding Items for Comfort
An emergency kit isn’t just about physical survival; it’s also about managing emotional strain. This is especially true if you have children. Waiting out an evacuation can be long and stressful, so packing items for comfort is a smart move. Think about including books, a deck of cards, or simple games that don’t require batteries. These can provide a much-needed distraction from anxiety. According to Homeland Security’s Two Weeks Ready guidance, these small additions make a significant difference in your family’s ability to cope, helping to pass the time and reduce the stress of an uncertain situation.
What to Pack for Clothing and Bedding
If you have to evacuate, you might be away from home longer than you expect. Pack a complete change of clothes for everyone, focusing on layers you can add or remove as conditions change. Include rain gear and a pair of sturdy, comfortable shoes or boots—you may need to walk on uneven terrain. For sleeping, pack a warm sleeping bag or blanket for each person, as these are vital for staying warm in a shelter or your car. For added preparedness, consider packing plastic sheeting and duct tape. These versatile items can be used to create a temporary shelter or seal a room from smoke, a critical function during a wildfire event.
How to Customize Your Emergency Kit
A generic, pre-made emergency kit is a good starting point, but it’s not a complete solution. The most effective kit is one you’ve personalized for your specific circumstances. After all, your family, your home, and your environment are unique. Taking the time to customize your supplies ensures that when an emergency strikes, you have exactly what you need to keep everyone safe and reduce stress during an already difficult time.
Think of your basic kit as a template. Now, it’s time to build on it by considering the people and pets in your home, the climate you live in, and the specific hazards you face, like wildfires. This extra layer of preparation is what transforms a box of supplies into a reliable lifeline. A truly personalized wildfire action plan accounts for these details, and your emergency kit should, too. By tailoring your kit, you’re not just checking a box; you’re creating a practical tool that’s ready for real-world challenges.
Tailor the Kit for Your Family
Your family’s needs should be the primary driver of your kit’s customization. When you build a kit, think through the daily needs of every person in your household. If you have an infant, you’ll need to pack formula, diapers, wipes, and bottles. For older adults, include any necessary medications, spare glasses, or hearing aid batteries.
Consider the unique health and comfort needs of each family member. Do you have a child who relies on a specific comfort item to stay calm? Pack it. Does someone have a severe allergy? Make sure you have extra epinephrine auto-injectors. This is about more than just survival; it’s about ensuring the well-being and comfort of your loved ones during a high-stress event.
Prepare a Kit for Your Pets
Your pets are part of the family, and they depend on you entirely during an emergency. Your kit needs to include supplies specifically for them. Start with the basics: a 14-day supply of their food in an airtight container and plenty of extra water. Don’t forget to pack bowls, a manual can opener if you use canned food, and any medications they take daily.
Beyond food and water, think about evacuation. You’ll need sturdy leashes, harnesses, and a pet carrier labeled with your contact information. It’s also wise to include copies of their medical records and a recent photo of you with your pet to prove ownership. Having a dedicated pet emergency kit ready to go will make a chaotic situation much more manageable for both you and your furry companions.
Adjust Your Kit for the Climate
Where you live has a major impact on what you need in your kit. For those of us in California and other wildfire-prone regions, preparing for heat, sun, and dry conditions is critical. Your kit should include lightweight clothing, sun hats, sunscreen, and extra water to prevent dehydration. The intense heat can also degrade your supplies.
Store your kit in a cool, dark, and dry place, like a closet or insulated garage cabinet, where the temperature is relatively stable. This helps preserve the shelf life of food, water, medications, and batteries. Extreme heat can cause batteries to leak and food to spoil faster, so choosing the right storage spot is a simple but crucial step in keeping your kit effective.
Plan for Local Risks
Finally, customize your kit for the most likely disasters in your area. While a general kit covers many situations, adding a few specific items can make a world of difference. The American Red Cross suggests thinking about what you’d need for local hazards. For homeowners in wildfire zones, this is non-negotiable.
Your kit must include N95 or P100 respirator masks for every family member to protect their lungs from smoke and ash. Goggles are also essential for shielding your eyes from embers and irritants. Consider packing sturdy leather gloves for handling hot or sharp debris and a whistle to signal for help. These wildfire-specific additions turn your general emergency kit into a targeted, life-saving resource tailored to the threat you’re most likely to face.
How to Store and Organize Your Kit
Building your emergency kit is a huge step, but where you keep it and how you organize it are just as important. In the stress of an evacuation, you won’t have time to search for misplaced supplies or sort through a jumble of items. A well-organized kit saves precious minutes when every second counts. The goal is to create a system that is both protected from damage and immediately accessible.
Think of your kit as your grab-and-go lifeline. It should be stored in a way that keeps everything inside safe, dry, and in good condition. Proper organization also makes it much easier to check for expired items and rotate your supplies, ensuring your kit is always ready. By taking a few extra steps to store and arrange your kit thoughtfully, you give yourself and your family the best chance of navigating an emergency calmly and effectively. This isn't just about packing supplies; it's about creating a reliable resource you can count on when you need it most.
Choose the Right Containers
The right container protects your supplies and makes them easy to carry. You don’t need anything fancy. Look for one or two large, durable containers like a duffel bag, a backpack, or a plastic bin with a secure lid. The key is portability—you should be able to grab it and go without a struggle. Inside your main container, store items in airtight plastic bags or smaller labeled pouches. This keeps things dry, organized, and protected from pests or leaks. For example, group all first-aid supplies in one large, sealed bag and all hygiene items in another.
Decide Where to Keep Your Supplies
Your kit does no good if you can’t find it. Designate a single, consistent storage spot that every member of your household knows. A hall closet, a space in the garage near the door, or a mudroom are all excellent choices. The location should be cool, dark, and dry. Avoid burying it in the back of a cluttered storage room. For complete preparedness, consider keeping smaller, 24-hour kits in your car and at your workplace. These should include essentials like water, food, a first-aid kit, and comfortable walking shoes in case you’re away from home when a disaster strikes.
Protect Your Kit from Heat and Cold
Extreme temperatures can spoil food, degrade medications, and damage batteries. Store your kit in a place with a relatively stable, cool temperature, away from direct sunlight. A garage or shed that gets very hot in the summer or freezes in the winter is not an ideal spot for your primary kit, as the fluctuating temperatures can shorten the shelf life of your supplies. A closet inside your home is often the best option. This simple step ensures that when you need your supplies, they are safe and effective when you need them most.
Create a Simple Organization System
When you’re under pressure, you need to find things quickly. Organize your kit with a clear, simple system. Group similar items together—food with food, tools with tools, and medical supplies with medical supplies. Use smaller bags or containers within your main kit and label everything clearly. This way, you can grab your first-aid pouch without digging through canned goods. This level of organization is a core part of a solid wildfire action plan, as it removes guesswork and helps you stay focused during a high-stress evacuation.
Keep Your Kit Ready to Go
Building your emergency kit is a huge step toward protecting your family, but it’s not a one-and-done project. A kit that sits in a closet for five years untouched might not be very helpful when you need it most. Supplies expire, family needs change, and seasons shift. Think of your kit as a living resource that requires a little attention to stay effective. Regular maintenance ensures that when an evacuation order comes, you can grab your kit with confidence, knowing everything inside is fresh, functional, and ready for the challenge ahead. This small, ongoing effort is what makes your preparedness plan truly reliable.
Check Your Inventory Regularly
Set a recurring calendar reminder—every six months is a good rhythm—to do a full inventory of your kit. Life changes, and your kit should change with it. A kit you packed when your children were toddlers will look very different from one you need when they’re teenagers. As you review your supplies, ask yourself if anything is missing based on new skills, health conditions, or family members (including pets). This is also the perfect time to check that items haven’t been “borrowed” from the kit for a camping trip or power outage and forgotten to be replaced. A quick check-in twice a year keeps your kit aligned with your family’s current needs.
Track Expiration Dates
Many critical items in your kit have a shelf life. Canned goods, water, medications, and batteries all expire. Create a simple system to keep track. You can tape a list of expiration dates to the lid of your container or keep a note on your phone. When you add new items, use a marker to write the expiration date in large, clear numbers on the packaging. This makes it easy to see what needs replacing at a glance. Practice a “first in, first out” rotation: when you buy new supplies, add them to the back and move older items to the front to be used in your daily pantry before they expire.
Update Your Kit Seasonally
Your needs can vary dramatically between a hot, dry summer and a cold, wet winter. Make it a habit to adjust your kit as the seasons change. In the spring, you might swap heavy wool blankets for lighter ones and add sunscreen and extra water to prepare for summer heat. In the fall, you can add warm layers, hand warmers, and insulated gloves back into your kit. This seasonal refresh ensures your supplies are appropriate for the most likely weather conditions you’ll face during an emergency, keeping your family safe and as comfortable as possible no matter the time of year.
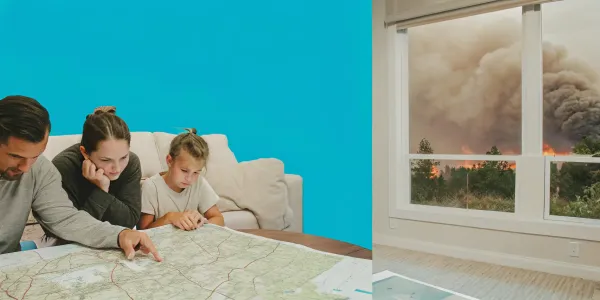
Review the Plan with Your Family
Your physical kit is only one part of a successful emergency strategy. The other part is making sure everyone in your household knows what to do. After all, emergency help might not be able to reach you right away after a disaster. Sit down with your family and walk through the plan. Show them where the kit is stored and what’s inside. Discuss your evacuation routes and communication plan. Running through the steps together reduces panic and helps everyone, including children, feel more in control. A well-rehearsed plan is just as vital as a well-stocked kit. Your personalized Wildfire Action Plan is the perfect tool to guide this conversation and ensure everyone is on the same page.
Your 14-Day Emergency Kit Checklist
Putting together an emergency kit can feel like a huge task, but breaking it down makes it manageable. Think of this as your final, scannable checklist to ensure you haven't missed anything critical. A complete kit means you and your family can be self-sufficient for two weeks if a disaster strikes and emergency services can't reach you right away. Use these lists to cross-reference what you’ve already packed and identify any gaps. This isn't just about having supplies; it's about having peace of mind.
The Master Checklist of Essentials
Every home’s emergency kit should start with the same core components. These are the non-negotiable items that will cover your most basic survival needs. While you’ll customize your kit later, this master list is your foundation for safety.
Here are the absolute essentials:
- Water and Food: Enough for every person for 14 days.
- First-Aid Kit: A well-stocked kit to handle common injuries.
- Lighting: Flashlights or headlamps with plenty of extra batteries.
- Communication: A battery-powered or hand-crank radio to receive emergency broadcasts.
- Air Quality: Dust masks to filter contaminated air.
- Navigation: Local maps, in case GPS and cell service are down.
- Power: A portable charger or power bank for your cell phone.
For a more exhaustive list of items, you can build a kit following federal guidelines.
How Much Do You Really Need?
The general rule for water is to store one gallon per person, per day. This amount covers what you’ll need for drinking as well as for basic personal hygiene and cleaning. For a family of four, that means you’ll need to store 56 gallons of water for a two-week supply. For food, pack a 14-day supply of non-perishable items for each family member. Focus on canned goods, dried fruit, and other foods that don’t require cooking or refrigeration. Being two weeks ready with enough food and water is one of the most important steps you can take.
Checklist for Special Needs
Once you have the basics covered, it’s time to add items specific to your family’s unique needs. Every household is different, so your kit should reflect that. Think about daily necessities that you can’t go without, especially if you have infants, elderly family members, or individuals with medical conditions.
Consider adding:
- Medical Supplies: Prescription medications (a two-week supply), hearing aids with extra batteries, glasses or contact lenses, and any necessary items like syringes.
- Baby Supplies: Formula, bottles, baby food, and diapers.
- Pet Supplies: Food, water, medications, and a carrier or leash.
The American Red Cross offers a great guide on what to include in a survival kit for all members of your family.
Your Monthly Maintenance Checklist
An emergency kit is a living resource, not a one-and-done project. To keep it effective, you need to perform regular maintenance. If you use something from the kit, make it a habit to replace it immediately. Your family’s needs will also change over time—children grow, prescriptions get updated, and food preferences shift. Set a reminder on your calendar to review your supplies every six months. Check expiration dates on food, water, and medications, and swap out anything that’s nearing its end. This simple routine ensures your kit is always ready to go when you need it most.
Related Articles
Frequently Asked Questions
Why 14 days? That seems like a lot. After a major disaster like a wildfire, emergency services can be completely overwhelmed, and it may take a long time for help to arrive or for roads to become passable. The 14-day recommendation is based on real-world scenarios where communities have been cut off from resources for an extended period. This two-week buffer ensures your family can remain safe and self-sufficient without outside assistance, giving you a critical safety net during a prolonged crisis.
Can I just buy a pre-made kit online instead of building my own? A pre-made kit is certainly better than nothing and can be a good starting point. However, these kits are generic and won't be tailored to your family's specific needs. They won't include your personal prescription medications, copies of your important documents, or supplies for your pets. Building your own kit is the only way to guarantee you have exactly what your family needs to be safe and comfortable.
What's the most common mistake people make when packing their kit? The biggest mistake is treating it like a checklist and then forgetting about it. A kit is only effective if it's personalized and maintained. People often forget to include copies of critical documents like IDs, insurance policies, and deeds, which are incredibly difficult to replace after a disaster. Another common error is failing to pack for the actual people and pets in the house, leaving out essential medications, baby formula, or pet food.
How can I manage rotating food and water without being wasteful? The best method is to treat your emergency kit as an extension of your pantry. When you do your grocery shopping, buy a few extra non-perishable items for your kit. At the same time, take the oldest items from your kit and move them into your kitchen to be eaten. This "first in, first out" system creates a simple, continuous cycle that ensures your emergency food is always fresh and nothing goes to waste.
My garage gets really hot in the summer. Is it still okay to store my kit there? You should avoid storing your primary kit in a place with extreme temperature swings, like a hot garage or shed. High heat can spoil food and water, degrade the potency of medications, and cause batteries to leak and fail. Your best bet is to find a cool, dark, and dry spot inside your home, like a hall closet or a pantry, where the temperature is more stable. This will protect your supplies and ensure they are safe and effective when you need them most.