Class A Roof Assembly: A Homeowner's Guide
Learn what a class A roof assembly is, why it matters for wildfire safety, and how to choose the right materials to protect your home and stay insurable.
It’s easy to feel powerless when facing the dual threats of wildfire and a chaotic insurance market. But you have more agency than you think. While you can’t control the weather or insurance industry trends, you can control your home’s vulnerabilities. The single most impactful upgrade you can make is installing a fire-resistant roof. This isn’t just about swapping out shingles; it’s about installing a complete, certified Class A roof assembly designed to repel embers and resist flame. This proactive step is a clear signal to insurers that your property is a lower risk, putting you in a stronger position to secure coverage and protect your most valuable asset on your own terms.
Key Takeaways
- A Class A Roof Is a Complete System, Not Just a Shingle: True Class A protection requires the entire roof assembly—deck, underlayment, and covering—to be installed correctly by a professional. This ensures the system performs as designed and meets official compliance standards.
- This Upgrade Is Your Key to Staying Insurable: In many high-risk areas, a certified Class A roof is a non-negotiable requirement for both building codes and insurance carriers. Keep all project paperwork, like permits and invoices, to prove compliance and secure discounts on your premium.
- A Great Roof Needs a Hardened Home to Support It: Your roof is your primary defense against embers, but its effectiveness depends on the rest of your home. Support your investment by clearing debris from gutters, sealing vents with fine mesh, and maintaining defensible space.
What Is a Class A Roof?
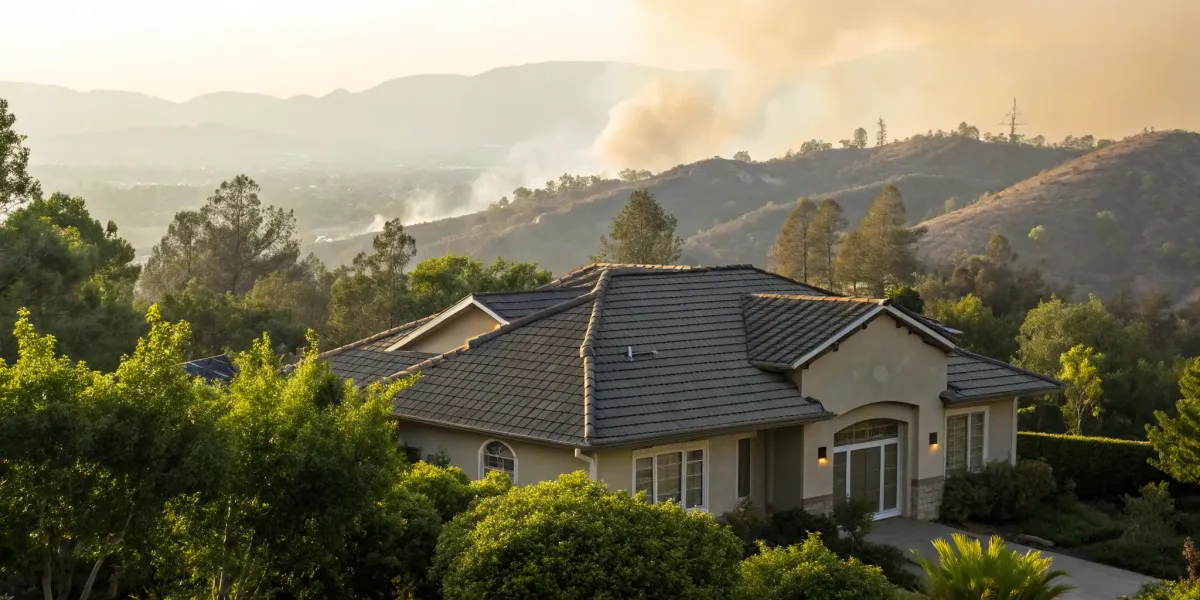
When you live in a wildfire-prone area, your roof is your home's first and most important line of defense. It’s the largest, most exposed surface, making it the primary target for wind-blown embers that can travel a mile or more ahead of a wildfire. This is why insurers and fire officials focus so heavily on its construction. A Class A roof isn't just a type of shingle; it's a complete roofing system engineered and tested to provide the highest level of protection against severe fire exposure. Think of it as a shield designed to withstand direct flames and prevent burning embers from igniting your home. For homeowners struggling with non-renewal notices or steep premium increases, upgrading to a Class A roof is often a non-negotiable first step toward staying insurable. Understanding what this rating means—and what it requires—is critical for protecting your family and your investment.
How Are Roofs Rated for Fire Safety?
Roofing materials and systems are assigned a fire rating after undergoing standardized testing. These ratings classify how well a roof can resist an external fire, and they are grouped into three categories: Class A, Class B, and Class C. Class A is the best rating a roof can receive, indicating it has the highest resistance to fire. Class B offers moderate protection, and Class C provides only light fire protection. In most high-risk wildfire zones across California and other western states, building codes and insurance companies require a Class A roof assembly to ensure your home has a sufficient defense against fire.
What Makes Up a Class A Roofing System?
A Class A rating isn't just about the shingles or tiles you see on top. It applies to the entire roofing system, or "assembly," working together. This includes the roof deck (the structural wood surface), a fire-resistant underlayment, and the roof covering itself. The most common Class A roofing materials are inherently non-combustible or fire-retardant. These include materials like metal, concrete tiles, clay tiles, and slate. Certain types of asphalt fiberglass composition shingles can also achieve a Class A rating when combined with the right underlayment and decking, making them a popular and often more affordable option.
How Are Class A Roofs Tested?
To earn a Class A rating, a complete roof assembly must pass a series of demanding, standardized tests that simulate real-world fire conditions. These evaluations are designed to measure performance against different types of fire exposure. The main tests include the Spread of Flame Test, which measures how far fire travels across the roof surface; the Intermittent Flame Test, which exposes the roof to an on-and-off flame; and the Burning Brand Test. This last test is especially important for wildfire safety, as it places a burning piece of wood on the roof to see if it ignites the assembly and penetrates to the underlying structure.
Why the Whole "Assembly" Matters, Not Just the Shingles
It’s easy to assume that buying "Class A shingles" is enough, but that’s a common and dangerous mistake. The fire rating applies to the entire roof system as it was tested in a lab. A Class A shingle installed over a flammable, unrated underlayment will not provide Class A protection. Every component—from the roof deck to the underlayment and the final covering—must work together to achieve the rating. This is why professional installation is so important; your roofer must follow the manufacturer's exact specifications to ensure your roof performs as a true Class A assembly. When getting quotes, always confirm the contractor is installing a complete Class A system.
Choose the Right Class A Materials
Once you understand that a Class A roof is a complete system, the next step is selecting the right components. Your choice of materials is the most visible part of this system and plays a huge role in both performance and curb appeal. Fortunately, you don’t have to sacrifice aesthetics for safety. Many of today’s most durable and attractive roofing options meet the highest standards for fire resistance, giving you peace of mind without compromising your home’s design. This is a critical decision in your home hardening journey, and making an informed choice puts you in control of a major factor in your home's defense against wildfire.
Common Class A Roofing Materials
You have several excellent options when it comes to Class A roofing materials. Each offers a different look and price point, but all provide top-tier fire protection when installed as part of a complete Class A assembly. The most common choices include:
- Metal: Standing seam or shingle-style metal roofs are non-combustible, durable, and reflect heat.
- Clay or Concrete Tiles: These are classic choices known for their longevity and inability to burn.
- Slate: As a natural stone, slate is inherently fireproof and offers a premium, long-lasting roofing solution.
- Asphalt Shingles: Not all asphalt shingles are equal. You must select ones specifically manufactured and tested to achieve a Class A fire rating.
What Makes These Materials Fire-Resistant?
A material’s fire resistance is its ability to withstand direct flames and intense heat without breaking down, catching fire, or allowing heat to transfer to the materials underneath. For homeowners in wildfire-prone areas, the most critical feature is resistance to embers. Wind-blown embers are the leading cause of home ignition during a wildfire. Class A materials are designed to prevent these glowing embers from igniting your roof. This quality is what makes them a cornerstone of home hardening and a key factor in protecting your property from a wildfire.
The Official Testing and Certification Process
A Class A rating isn't just a marketing term; it's a certification earned through a rigorous testing process. To qualify, a roofing assembly must pass a series of demanding trials that simulate severe fire exposure. These include the spread of flame test, the intermittent flame test, and the burning brand test. During this process, the roof must endure a 1,400°F flame with 12 mph winds for a set period without the fire spreading more than six feet. This official process ensures that any roof with a Class A label has proven its ability to perform under pressure.
What Does a Class A Roof Cost?
The cost of a new Class A roof can vary widely, so it’s important to understand the factors that influence the final price. The material you choose is the biggest variable—slate and metal are typically more expensive than Class A asphalt shingles. Other key factors include the size and complexity of your roof, its accessibility for work crews, and the condition of your existing roof structure. If your old roof must be torn off or the underlying decking needs repairs, that will add to the overall project cost. Getting multiple quotes can help you understand the roof replacement costs for your specific home.
Install and Maintain Your Roof Correctly
Choosing the right materials is the first step, but it’s only half the equation. A Class A roof assembly performs as a system, and its effectiveness hinges entirely on proper installation and consistent maintenance. Even the best fire-resistant shingles can fail if they’re installed incorrectly or if the roof isn’t cared for over time. This is a critical point that insurers look at closely when assessing your home’s risk.
Think of it this way: you wouldn’t buy a high-performance car and then skip the oil changes. Your roof is your home’s first line of defense against embers, and it requires the same level of attention. From ensuring professional installation to performing simple annual checks, these steps are essential for protecting your investment, your home, and your family. Taking these actions not only preserves your roof’s fire rating but also gives you peace of mind and helps you stay insurable in a challenging market.
Why Professional Installation Is Non-Negotiable
A Class A fire rating isn't just about the shingles you choose; it applies to the entire roofing system, from the underlying deck to the final covering. For a roof to be officially recognized as a Class A roof assembly, it must be installed precisely according to the manufacturer's specifications and tested as a complete unit. This is not a weekend DIY project.
Hiring a licensed, experienced roofing contractor who understands local fire codes is critical. They ensure every component works together to achieve the required fire resistance. An improper installation can create vulnerabilities for embers to exploit and can void both the manufacturer's warranty and the roof's official fire rating—a costly mistake you can’t afford to make in a high-risk area.
Don't Forget Proper Attic Ventilation
Proper attic ventilation might not be the first thing you think of for fire safety, but it plays a vital role in your roof's long-term health and durability. Good airflow prevents heat and moisture from building up in your attic. This is crucial because trapped moisture can lead to the deterioration of your roof deck and other structural components, weakening the entire assembly over time.
A compromised roof structure is more vulnerable to all kinds of damage, including fire. By maintaining the integrity of your roofing materials, you help ensure your Class A system performs as expected when you need it most. A professional roofer can assess your home’s specific roofing challenges and recommend the right ventilation strategy to protect your investment from the inside out.
Your Annual Inspection Checklist
While your new roof will be checked by official inspectors during and after the project to ensure it meets safety codes, your role doesn’t end there. Performing a simple visual inspection at least once a year can help you catch small problems before they become major issues that could compromise your roof's fire rating.
Walk around your property and use binoculars to safely check for:
- Missing, cracked, or slipping tiles or shingles.
- An accumulation of leaves, pine needles, or other debris.
- Damage to flashing around chimneys, vents, and skylights.
- Signs of moss or algae growth, which can trap moisture.
Documenting your annual checks can also be useful if you ever need to file an insurance claim. It shows you’re taking proactive steps to maintain your property.
Simple Steps for Long-Term Upkeep
Ongoing maintenance is a straightforward but essential part of home hardening. Embers can travel a mile or more ahead of a wildfire, and they tend to collect in the same places leaves and pine needles do. Your most important task is to keep your roof and gutters clean and clear of flammable debris.
Make it a regular habit, especially before fire season, to remove any buildup of leaves, pine needles, and branches from your roof’s surface and valleys. It’s also critical to fill any gaps between your roof covering and the underlying sheathing. Sealing these small openings can prevent wind-blown embers from getting underneath your roofing material and igniting your home from within.
How to Preserve Your Roof's Fire Rating
Remember, the Class A rating applies to the entire roof assembly, not just one component. This means any changes or repairs must maintain the system's integrity. For example, even if you have Class A-rated metal panels, the system won't meet the standard if it's installed over a flammable wood substrate without the proper underlayment.
When making repairs, use materials that are compatible with your existing system and meet the same fire-resistance standards. Any modification, like installing a new skylight or vent, must be done correctly to avoid creating a weak point. Preserving your roof’s fire rating means treating it as a complete, interconnected system where every piece plays a critical part in your home’s defense.
Meet Codes and Lower Your Insurance Bill
Installing a Class A roof isn't just about upgrading your home; it's a critical step toward securing its future, especially in a challenging insurance market. For many homeowners in high-risk areas, it’s a non-negotiable requirement for both legal compliance and insurance coverage. Beyond meeting regulations, a certified fire-resistant roof is one of the most powerful statements you can make to an insurance carrier that you are serious about reducing your wildfire risk. This investment can be the key to not only keeping your policy but also earning meaningful discounts that make coverage more affordable over the long term. It’s about taking control—making a tangible improvement that protects your property, satisfies legal codes, and strengthens your financial standing.
Local Building Codes for High-Risk Fire Zones
In many areas vulnerable to wildfire, a Class A roof is not just a smart choice—it's the law. Local building codes, especially in designated Fire Hazard Severity Zones, often mandate these fire-resistant systems for new construction and significant remodels. For example, many communities in Los Angeles County require Class A roof assemblies for new homes and major roof replacements to mitigate fire spread. These regulations are in place for a reason: they create a stronger, more resilient community. Before starting any project, your first step should be to check with your local building or fire department to understand the specific requirements for your property. This ensures your investment is compliant from day one.
How to Ensure Your Project Is Compliant
Compliance is everything when it comes to your roof. If you live in a high-risk area and replace more than 50% of your existing roof, building codes often require you to upgrade the entire structure to a Class A assembly. To ensure your project meets these strict standards, it’s essential to hire a licensed and insured contractor who is experienced with Class A installations and local fire codes. A qualified professional will know that they must follow the manufacturer’s specific installation instructions—a key detail for both compliance and your warranty. They should also handle the permitting process, which provides a third-party inspection to verify the work was done correctly, giving you and your insurer confidence in the final product.
The Big Payoff: Earning Insurance Discounts
A compliant Class A roof does more than protect your home; it can directly lower your insurance bill. As insurers in states like California become more selective, demonstrating proactive mitigation is crucial for staying insurable. A certified Class A roof is a powerful signal that your property is a lower risk. In fact, California now requires insurance companies to offer discounts for specific home hardening measures. Under the state’s Safer from Wildfires regulation, installing a Class A roof is a primary action that qualifies homeowners for premium reductions. This makes the upgrade a clear financial strategy for managing the rising cost of coverage.
What Paperwork Will Your Insurer Want to See?
When you’ve made the investment, you need to prove it. Your insurance company won't just take your word for it; they will require specific documentation to grant you a discount or even continue your policy. Be prepared to provide a complete file on your roofing project. This should include detailed invoices that list the specific Class A-rated materials used, a copy of the finalized building permit, and a certificate of completion from your contractor. Taking photos during and after the installation can also be helpful. This paperwork serves as official proof that your roof was installed correctly and meets the Class A fire-rating for the entire assembly, not just the shingles.
Is a Class A Roof a Good Investment?
Yes, absolutely. A Class A roof is one of the most effective investments you can make for your home’s safety and your financial peace of mind. It directly addresses the primary threat from wildfires: wind-blown embers, which can travel a mile or more ahead of a fire and are responsible for igniting the majority of homes. By preventing embers from catching hold, you drastically reduce the chance of ignition. This single upgrade satisfies building codes, makes you eligible for insurance discounts, and can increase your property value. More importantly, it’s a foundational part of a comprehensive defense system. When you’re ready to take the next step, you can build on that foundation by creating a complete Wildfire Action Plan for your home.
Your Roof Is Just One Part of Your Home's Defense
Installing a Class A roof is one of the most important investments you can make in your home’s wildfire resilience. Because of its large, horizontal surface, your roof is the area most exposed to falling embers, which are the primary cause of home ignition during a wildfire. But a fire-resistant roof alone isn’t enough. True protection comes from treating your home as a complete system, where the roof, walls, vents, and surrounding landscape all work together to create a robust defense.
Think of it this way: a Class A roof is your home’s helmet, but it can’t do its job if other vulnerabilities are left exposed. Embers can find their way into tiny gaps you might not even know exist. To stay insurable and genuinely protect your property, you need to look beyond the shingles and consider every element of your home’s exterior and the immediate space around it. This holistic approach, known as home hardening, is what gives you the best chance of withstanding a wildfire.
How Your Roof Works with Other Defensible Space
Your roof is the first line of defense against airborne embers, but its effectiveness is directly tied to the condition of your property. The concept of defensible space—creating a buffer of cleared, well-maintained vegetation around your home—is critical. Even the best Class A roof can be compromised if it’s covered in dry leaves and pine needles or if flammable tree branches hang directly over it. These materials provide fuel that can lead to a sustained fire, potentially overwhelming your roof's fire-resistant capabilities. Remember that some roofing materials achieve a Class A rating "by assembly," meaning the entire system, from the sheathing to the underlayment and covering, works together. Keeping that system clear of flammable debris is your responsibility.
Protect Your Home from Wind-Blown Embers
Wildfires don’t typically burn through a neighborhood as a solid wall of flame. Instead, they send a shower of wind-blown embers miles ahead of the fire front. These small, glowing embers are the real threat, as they can land on or get trapped in flammable materials and ignite a home. Choosing Class A materials like composite, metal, or tile is your first step. The second, equally important step is ember sealing. You must close off any gaps where the roof covering meets the sheathing or along the roof edge. Small openings under the curves of tile roofing, for example, can act as entry points for embers. Sealing these spaces with bird stops, flashing, or other appropriate materials is essential to block embers from getting underneath your roof covering.
Secure Your Vents to Keep Embers Out
Vents are a classic weak point in a home's defense. While necessary for attic and foundation ventilation, they can also serve as a direct entry point for embers into the most vulnerable parts of your house. To prevent this, all vent openings should be covered with a fine metal mesh screen (1/8-inch is the recommended standard). This includes attic, soffit, gable, and foundation vents. It’s also crucial to fill any gaps between the roof covering and the sheathing to prevent the intrusion of embers and flame. This step is a core part of home hardening and ensures that your fire-resistant roof isn't undermined by an unsecured opening just a few inches away.
Next Steps for Hardening Your Home
Once your roof is secure, it’s time to address the rest of your home’s exterior. The same principles of layered defense apply. For instance, some Class B or C roofing materials can achieve a Class A rating "by assembly" when additional fire-resistant materials are installed underneath. This concept extends to your entire home. Consider upgrading to dual-pane, tempered glass windows, which are more resistant to breaking from heat. Enclose the underside of eaves and decks to eliminate spots where embers can collect and ignite. Replace combustible siding with fire-resistant materials. Each step you take contributes to a more resilient structure, as detailed in comprehensive resources like the Wildfire Home Retrofit Guide.
Create Your Complete Wildfire Action Plan
Your roof assembly is often the most vulnerable part of your home in a wildfire simply because of its size and orientation. Taking steps to harden it is a powerful move toward protecting your property. But physical preparations are only half the battle. You also need a clear, actionable plan for what to do when a fire approaches. Knowing your evacuation routes, having an emergency kit ready, and establishing a communication plan can make all the difference for your family’s safety. A hardened home is safer, but an informed and prepared family is even safer. You can start building your own personalized Wildfire Action Plan today to ensure you’re ready for anything.
Related Articles
- Wildfire Action Plan | Comprehensive Wildfire Preparedness & Emergency Planning
- Wildfire Action Plan | Comprehensive Wildfire Preparedness & Emergency Planning
- Wildfire Action Plan | Comprehensive Wildfire Preparedness & Emergency Planning
Frequently Asked Questions
Is buying "Class A shingles" enough to get a Class A roof? No, and this is one of the most important things to understand. The Class A rating applies to the entire roofing system—the roof deck, the underlayment, and the final covering—all installed together exactly as they were tested. Simply placing a Class A shingle on top of an old or non-compliant base won't give you the protection or the certification you need. You must ensure your contractor is installing a complete, professionally certified Class A roof assembly.
Will installing a Class A roof guarantee I can keep my insurance? While there are no absolute guarantees in the current insurance market, installing a certified Class A roof is one of the most powerful steps you can take to remain insurable. It directly addresses the primary threat of ember ignition and shows insurers you are proactively reducing your home's risk. In California, it's a required step to qualify for mandatory discounts, making it a foundational investment for securing coverage.
What kind of paperwork do I need to get an insurance discount? Your insurer will need official proof of your upgrade. Be prepared to provide a complete file that includes the final invoice from your contractor detailing the specific Class A materials used, a copy of the signed-off building permit from your local jurisdiction, and any completion certificates. Keeping your own photo documentation of the process can also be a helpful addition to your records.
My new roof is installed. What's the most important thing I need to do to maintain it? Your most critical maintenance task is to keep the roof and gutters completely clear of flammable debris. Wind-blown embers from a wildfire will collect in the exact same spots that leaves and pine needles do. By regularly cleaning your roof surface, valleys, and gutters, you remove the fuel that could allow embers to ignite and compromise your home's primary defense.
I already have a Class A roof. What's the next most important step for home hardening? Once your roof is secure, your next focus should be on the openings in your home. Embers are the main threat, and they can enter through vents. Securing all attic, soffit, and foundation vents with 1/8-inch metal mesh screening is a critical next step. This prevents embers from getting inside your home's most vulnerable spaces. From there, you can build a complete defense by creating your own Wildfire Action Plan.